
[ad_1]
From humble RetroPie setups to the pricey Analogue Pocket, retro gaming boxes are big business these days. The current crop of gaming consoles like the PS5 and Xbox Series X are great machines in their own right, but they don’t offer much in the way of retro goodness–especially compared to standalone emulators. As such, if you’re looking to revisit the past on your TV, building a dedicated retro box is probably the right move.
If you pay any attention to this sort of thing, you’re probably familiar with RetroPie, the Raspberry Pi-supported software that allows you to play generations of retro games with a cheap build. Indeed, even the fanciest Pi-based build is probably going to run you in the neighborhood of $100, which makes it a great option for gamers on a budget. However, if you’re looking to build a truly enthusiast-grade machine–and you don’t mind dropping a bit of cash on it–you should consider putting together a MiSTer FPGA. Although it’s a hardcore machine, even the least technically inclined gamer can put it together.
MiSTer magic
Strictly speaking, MiSTer is an open-source project that births new life into classic consoles on modern hardware, as well as arcade machines. However, whereas software emulators have tiny inaccuracies and mistakes that experts can detect, a MiSTer uses FPGA technology (field-programmable gate arrays) to mimic the console on a per-cycle level. This makes it essentially identical to the real console–it’s as if your mom never sold your SNES to that big-box retailer for $25.

Thus, if you’re the kind of hardcore purist who spurns emulators in favor of original hardware, a MiSTer is probably a good investment. However, it is an investment, as supply-chain woes have caused the cost of the build to balloon to around $400. And that’s not including fancy extras you might want to throw in, such as a snazzy case. Ultimately, it’s up to you to determine if that’s a reasonable price for nostalgia, or perhaps curiosity. For me, it definitely was.
Before you embark on your MiSTer journey, it’s important to note that the basic board that the device relies on, the DE10-Nano, is often backordered or out-of-stock entirely. As such, if you’re unlucky, you may have to wait weeks (or even months) for the board to arrive. Most of the other components can be found on specialty storefronts like MiSTer Add-Ons without much trouble, but you should make sure everything’s in stock before you order.
The two main parts of a basic MiSTer build are the DE10-Nano and the SDRAM add-on board. Although the MiSTer can work without the add-on RAM, it’s necessary for many of the “cores” (consoles) that you’ll want to play, so we highly recommend it. Personally, I suggest buying the DE10-Nano directly from the manufacturer Terasic, as it tends to offer the largest volume of stock at the best price. You can buy the SDRAM add-on board at storefronts like MiSTer Add-Ons, as we did.
Setting up a MiSTer requires a small pile of tech items that you might have lying around your house, especially if you’re a PC gamer. You’ll need a USB Wi-Fi adapter, a microSD card reader, and a USB keyboard. You’ll also need a microSD card–the DE10-Nano comes with an 8 GB card, but we recommend 32 or even 64 GB for game space.
Since the DE10-Nano is not designed as a primary gaming device, it only has one micro-USB slot. As such, you’ll need a powered USB hub and a micro-USB-to-USB converter to plug it in. Trust us, it’s really annoying to have to rely on one tiny slot for all your inputs, so do yourself a favor and buy these items on Amazon before you order the board itself.
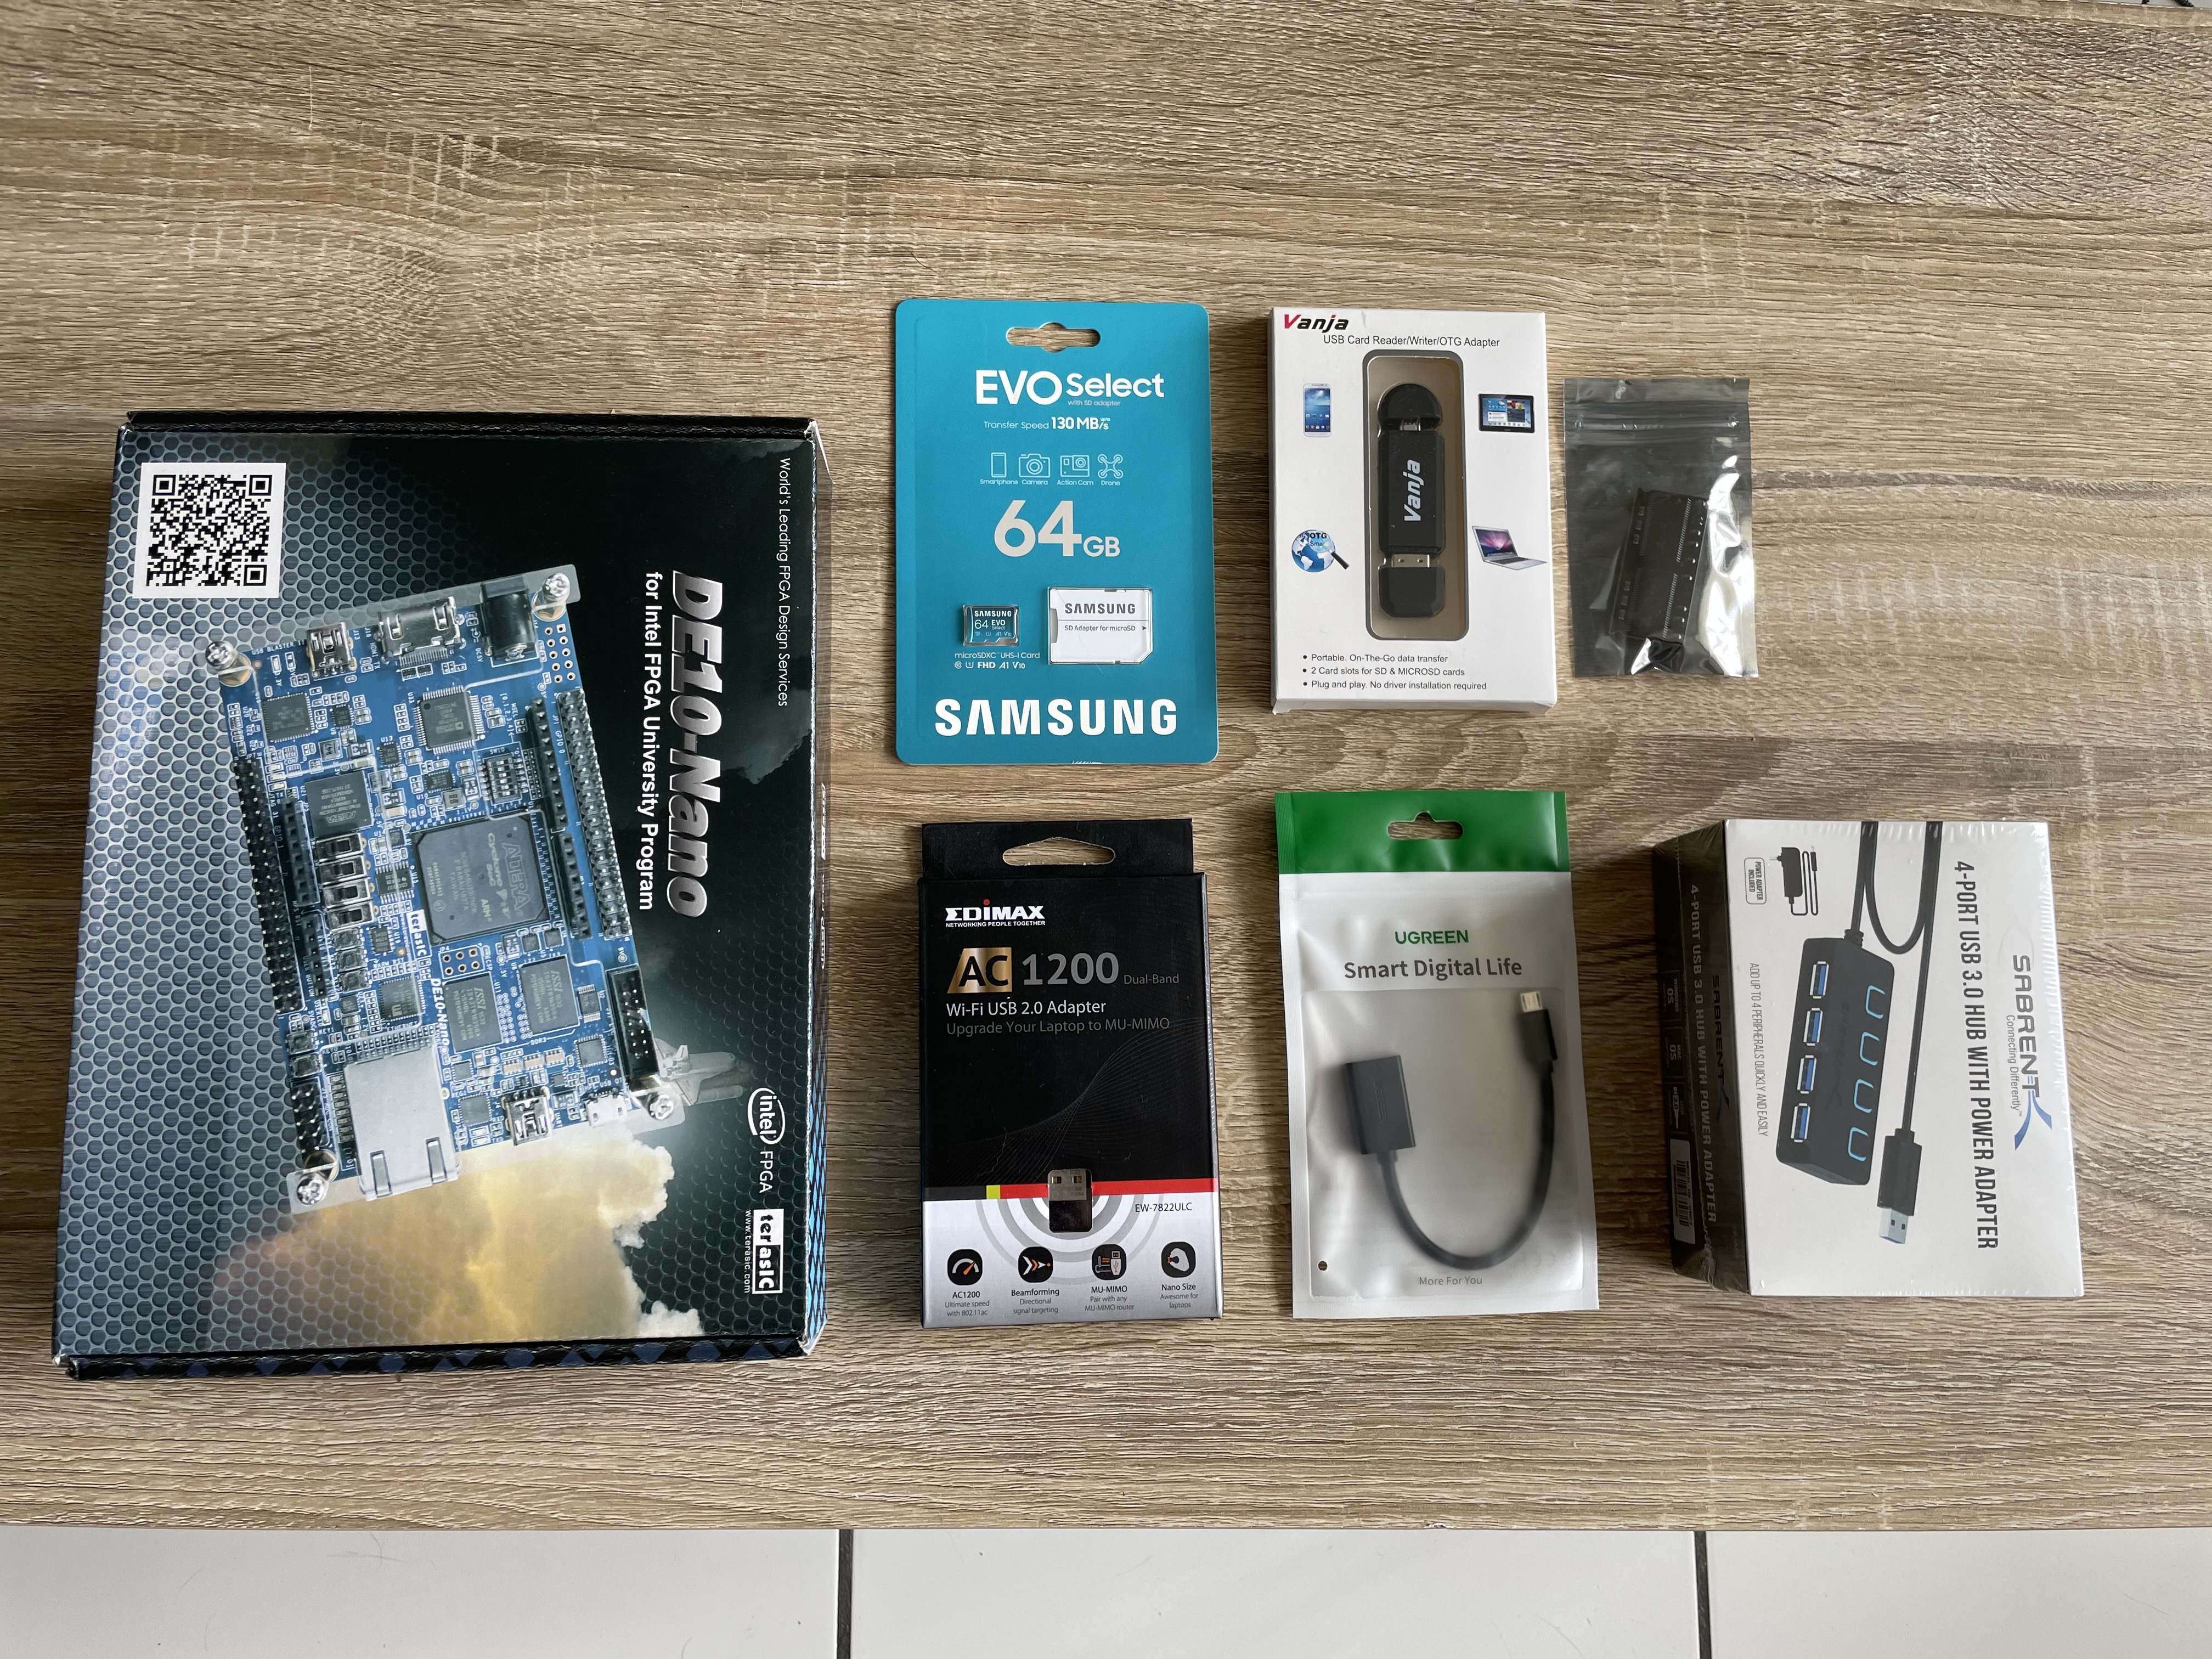
There are a number of optional add-ons that might enhance your MiSTer build, depending on your preferences and goals. For example, many MiSTer users recommend getting a heatsink and fan to cool the device. Although the heatsink is easy to set up–simply peel off the sticky end and attach it–the fan is a little trickier, and ultimately unnecessary if you plan on playing your device in a well-ventilated space. Additionally, if you’re planning on using your MiSTer with a CRT television, you’ll need a separate add-on to connect the right inputs.
Putting it all together
The actual act of putting together a MiSTer is incredibly simple. All you need to do is unscrew the top plate of the DE10-Nano, stick the SDRAM in the top slot (the power port should face your left), and then swap the default 8GB microSD card with your bigger version. Then you need to connect your HDMI cable, USB keyboard, and USB WiFi adapter. If you opted for a heatsink, simply stick it on the chip itself, and you’re ready to go.
Before turning on your MiSTer, you should install Mr. Fusion on the SD card with a disc-imaging software like Rufus. This is essentially the software brains of the MiSTer. Once you turn it on, you should see a black Mr. Fusion screen show up on your TV, where it’ll install automatically.
After installing Mr. Fusion, you’ll need to run the “Wi-Fi” and “update” scripts to get your MiSTer up and running. To do this, press Escape on your USB keyboard, go to Scripts, and keep selecting “yes.” Eventually, you should be able to set up internet via your WiFi adapter or an Ethernet cable. From there, you simply need to connect and set up your USB controller through the settings, which is a fairly self-explanatory process.
Getting games onto your MiSTer is similarly straightforward. As usual, the only legal way to play game ROMs on a device like the MiSTer is to dump physical games you own using certain tools developed for the process. If you already have a collection, we recommend simply putting the files on the MiSTer’s microSD card. You can also use a SFTP client like FileZilla to log into your MiSTer remotely, but that’s a bit more complicated. You’ll need the MiSTer’s IP address to do this–the username is root and the password is “1.” Leave the port to default, or enter “22.” Once you’re in, you can simply drag and drop the files, and presto, you’re done. If you’re having trouble with this, we recommend James Mackenzie’s guide.
In general, I highly recommend getting a controller with a decent D-pad for your MiSTer, as most of the games you’ll play on it were designed with that input in mind. 8BitDo controllers tend to feature good D-Pads for a fair price. Once you set up the MiSTer, it’s possible that you may notice input lag. If that’s the case, check out this repository of controller latency to determine if you’re using a particularly “slow” pad. Also, make sure to set your TV to “game mode” if it has one, as that can make a huge difference. And that’s really all it takes to set up a retro gaming box that can play everything just as well as a real console.
The products discussed here were independently chosen by our editors.
GameSpot may get a share of the revenue if you buy anything featured on our site.
[ad_2]